|
If you are too busy to make a monster you are in luck because I am selling a Monster In A Box Kit for $39 plus shipping anywhere in the US! Just contact me for shipping price. The kit includes pre-cut, pre drilled pieces, very simple color step by step instructions, outdoor screws, a styrofoam head, and garbage bags to help stuff your monster. All the things you need to make a 6 foot tall monster frame. You just follow the simple instruction sheet and in about 20 minutes you too will have a monster to call your very own. This monster is constructed of high quality PVC pipes (not the thin cheap kind in some kits) and outdoor screws which make this a product that will not fall apart and can be enjoyed for years to come. The sky's the limit with this creation. You just need clothes and a mask and you are set to begin spooking your neighbors and friends.
If you are interested in getting your very own MIB contact me via e-mail @
Online Contact Info
Dano
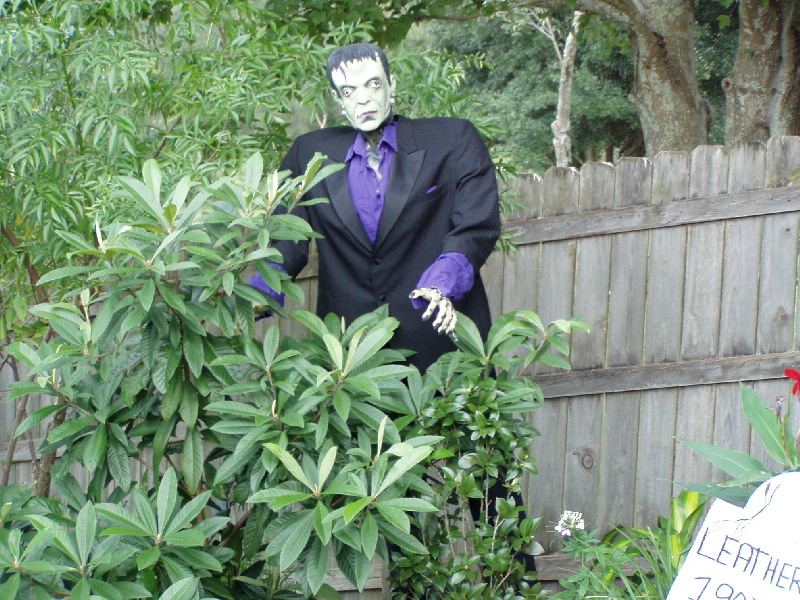
Here's How We Made An 8' Frankenstein
This Page is dedicated to creating your own monsters. I have found that the basic structure works well for any monster you wish to make larger than life!
Before you begin you will want to get 7 PVC "T" joints, 4 PVC 90* corner joints, 2 PVC 45* corner joints, and PVC pipes. All of which is available at your local hardware store.
|
|
|
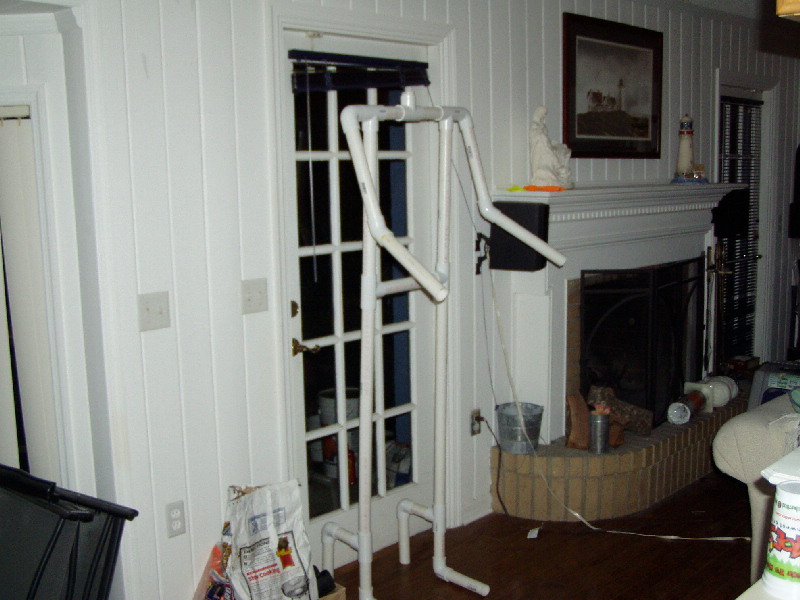
Start with a simple PVC Frame
To begin with you will need to decide just how large you want your monster to be. Keep in mind that the Monster is 3 pieces tall (2 short feet pieces, 2 leg pieces, and 2 body pieces) all connected by T joints. The distance from shoulders to waist should be about 1/3 the total height.
Start by connecting the short feet pieces to the leg pieces with a T joint facing backwards. These feet joints will be buried in the ground to give your monster stability.
When deciding the width of your monster keep in mind that the waist should be slightly smaller that the shoulders! Unless you are making all the clothing yourself this will make it easier to find outfits. |
|
Continue the Frame...
The waist will be connected to the frame by a T joint on either side of the frame. You will then connect the shoulders by using two more T joints.
The two short shoulder pieces are connected in the center by the last T joint that points up for a neck joint.
The arms are two 90* corner joints connected to the T joint by a very short PVC pipe that should completely disappear under the two joints. The arms are connected at elbow joints by 45* corner joints.
Once you are satisfied with the overall look of your monster I would suggest screwing all the joint pieces in place to keep your monster from falling to pieces! |
|
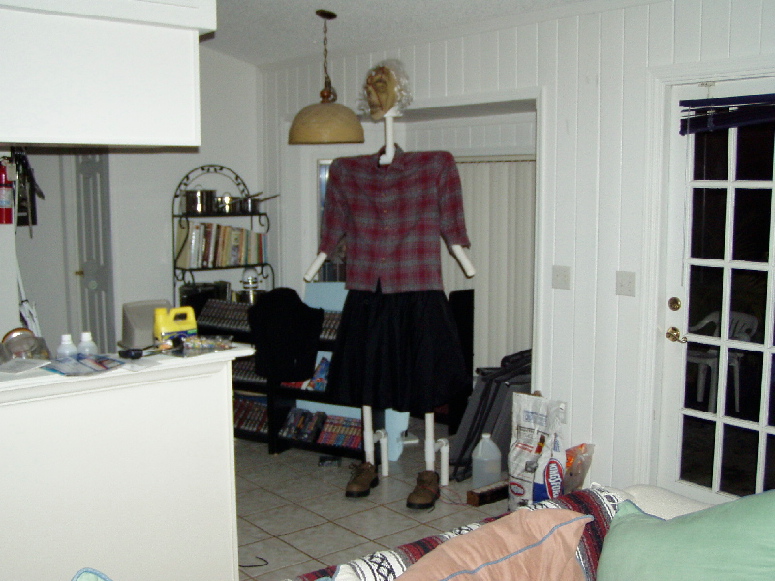
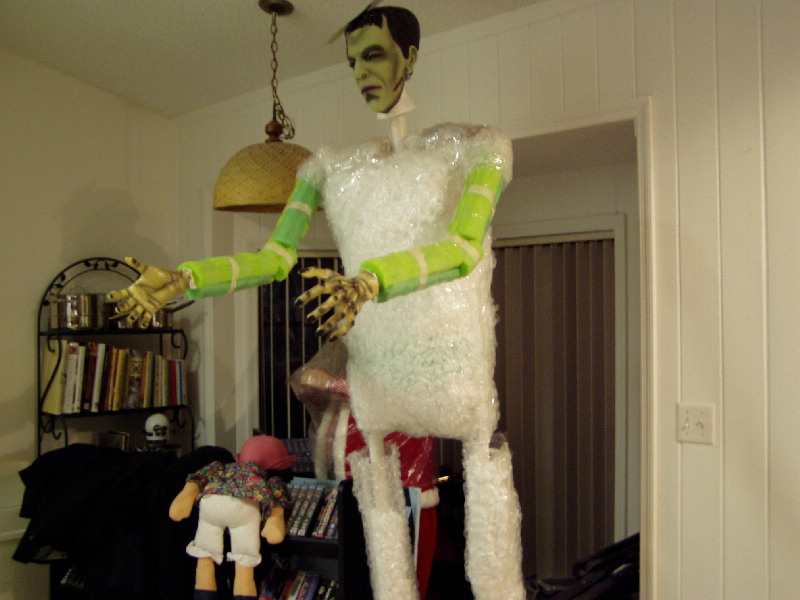
Give Your Monster Meat
Now that the frame is finished you can begin fattening him/her up.
I used large bubble wrap to give my monster body. I did this by wrapping bubble wrap around the body and taping it in place. I did the same for the legs, making the bubble wrap thicker at the thighs and tapering down to the feet.
For the arms I used an old pool water noodle that I cut lengthwise so that it would wrap around the PVC pipe. |
|
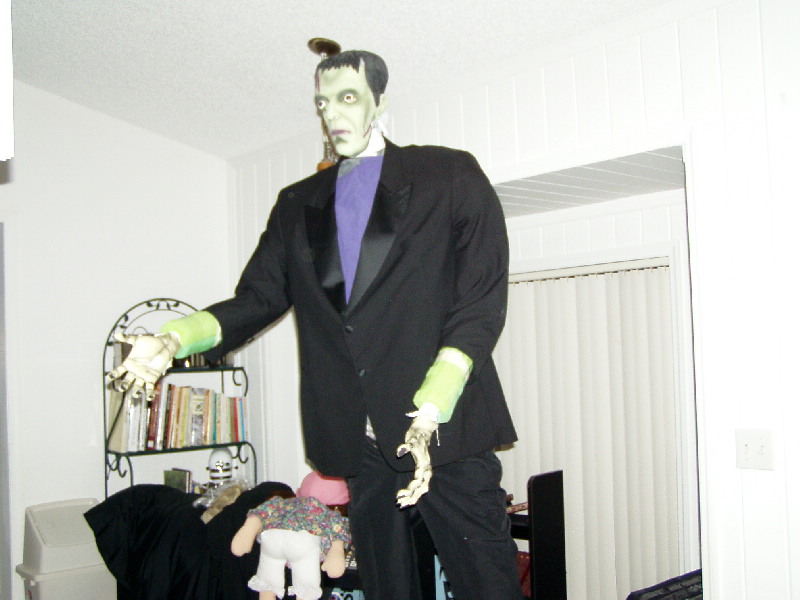
Dress It Up!
Next you get to have fun playing dress up with your new monster. It took me several weeks to get the outfit the way that I wanted it for Frankenstein, but it was well worth it.
The Mask and Hands were bought at a costume store, but all the rest of the clothing was found at thrift stores. It's used, cheap, and looks GREAT! Besides that it's easier to cut up used clothing. |
|
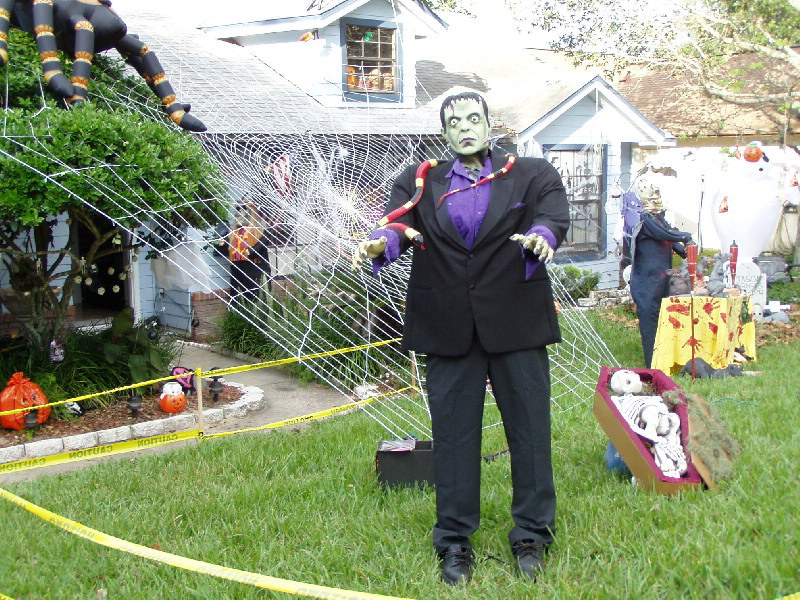
Finding a Home for your Monster
Once you have the monster dressed the way you want, it's time to give it a home!
After picking a location take the feet off the monster and plant them in the ground. Make sure that they are properly spaced so you can attach your monster!
Now that the feet are planted firmly in the ground, attach the rest of your monster and enjoy your work!
|
|
Somewhere Else?
The best part about your monster being planted in the ground is that you can have him/her standing without needing to prop it up. This makes it easy to move monsters to new locations without having to worry about what is around for support! |
|
New Monsters Come to Life
This monster is stuffed with plastic grocery and garbage bags full of styrofoam peanuts.
The peanuts are easier to shape and allowed me to give my monster a big gut to account for his eating habits. |
|